Note: This article was originally written in Japanese in December 2024 and translated into English with the help of ChatGPT. Hope you enjoy it!
Introduction
This post is part of the Generative AI Advent Calendar 2024.
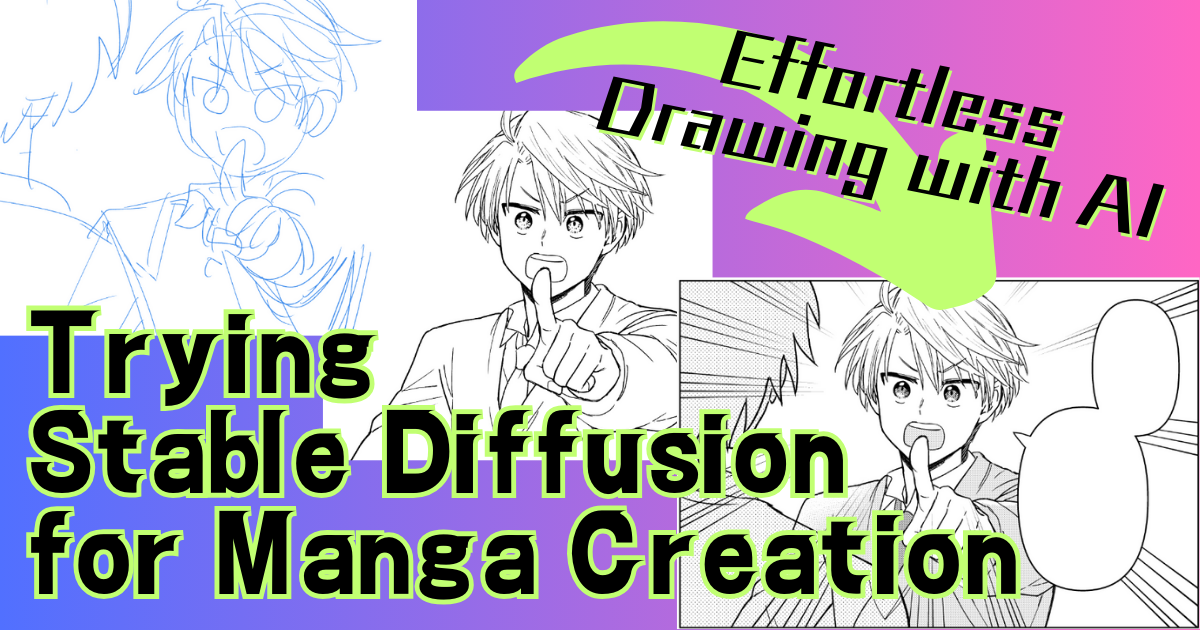
As the title suggests, it’s about how I used Stable Diffusion to make manga creation a lot easier. The process I’m sharing is something I tried around summer 2024, so some of the details might be slightly outdated. Still, I wanted to document it as a record of what I did in 2024. (That said, I believe this approach is still pretty relevant even at the end of the year.)
Pros and Cons of Using AI in Manga Creation
I’ve been drawing doujinshi manga as a hobby for about 20 years. It was fun and manageable in the beginning, but over the years, making art has become much harder. The biggest reasons are that I have less time now that I work full-time, and my physical stamina has declined. That’s why I decided to start using AI for drawing.
Using AI really makes the drawing process easier. Of course, it doesn’t always give you exactly what you imagined, so if you’re very particular, it might actually feel like more work. Also, it doesn’t necessarily save time. So what does it help with? It greatly reduces the mental and physical burden.
Less Strain on the Body and Mind
When drawing by hand, you have to make decisions about every dot and line—it’s surprisingly brain-intensive work. But with AI, that part is mostly taken care of. And since you don’t need to use as much physical strength in your hands and body, it also helped reduce my shoulder and back stiffness, nerve pain in my arms, and even lower back pain.
Not having to draw everything manually is a huge relief. The fatigue is completely different. Even though I knew drawing was exhausting, there was no other way before—but now, thanks to AI, I can lighten the load, and that honestly amazed me.
Even if you’re not as lazy as I am, I think using AI can free up mental energy, allowing you to focus more on creative decision-making. On the flip side, one possible downside is that you might end up trying to create art that looks like it was made by AI.
It Doesn’t Always Save Time
When it comes to black-and-white manga for print, using AI didn’t really change the total production time. Some panels took more time, others less—it balanced out to be about the same as drawing by hand.
However, for full-color pages or rich grayscale art, I do think it can significantly save time.
About the Models Used
Here are the models I used for this project:
- Base Model: Animagine XL 3.1
- LoRA: Custom LoRA trained on my own art style
- ControlNet: CN-anytest_v4-marged_am_dim256
- UI: Forge
Download Link for Anytest
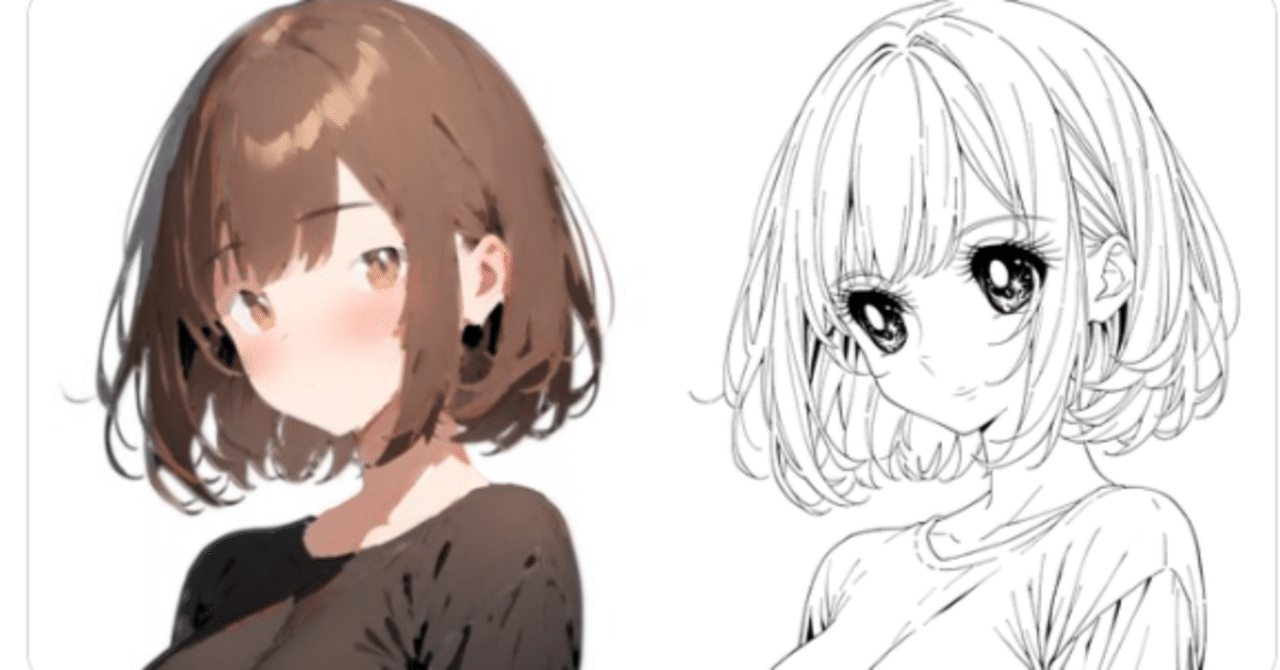
Anytest is an incredibly useful ControlNet model, especially for hand-drawn artists. It can do a variety of things—convert full-color images to line art, generate images from rough sketches, colorize, and more. If you haven’t tried it yet, I highly recommend giving it a go!
Note: There are different versions—one for Animagine and one for Pony (marked with “pn” in the name). The link above is for the Animagine version. Also, a version for SD1.5 was recently added.
Custom LoRA is Essential
Creating a LoRA based on your own art style is practically essential. It’s not just about the style—when working on manga, consistency between characters is key. If your characters aren’t consistent, readers may not recognize them as the same person. This kind of consistency is hard to achieve with AI alone, so making a LoRA for each character can save a lot of trouble.
There’s also the matter of art style. If you want your manga to look like your own work, LoRA is the way to go. Personally, I also find it very difficult to adjust the level of stylization (like how cartoony or realistic the image is) using just prompts, so it’s helpful to control that through LoRA as well.
The Manual Workflow Without AI
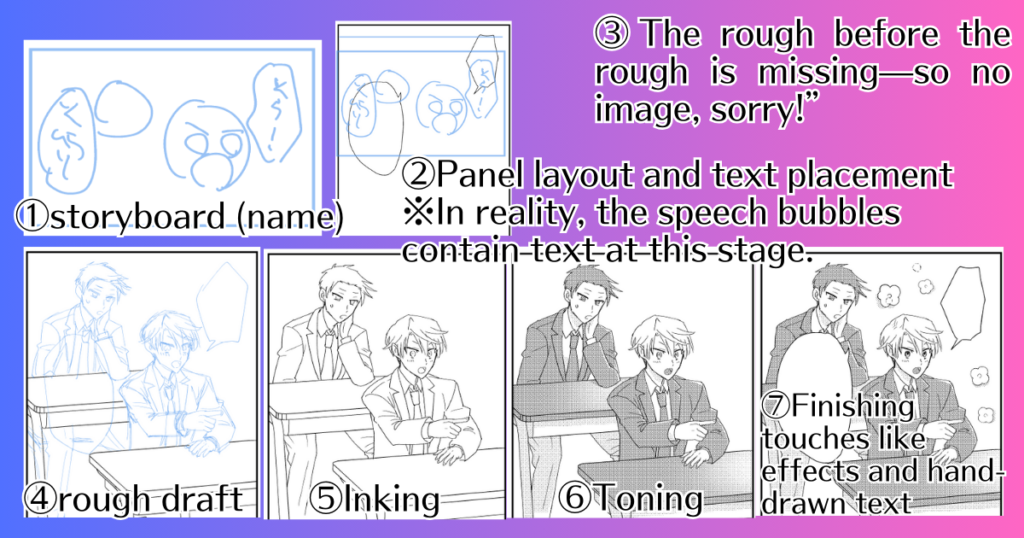
- Plot and storyboard (name)
- Panel layout and text placement
- Rough draft of the rough draft
- Actual rough draft
- Inking
- Toning
- Finishing touches like effects and hand-drawn text
What I Wanted to Solve
Drawing the Same Thing Over and Over
As you can see from the workflow, you have to draw the same image multiple times—name → rough of the rough → rough draft → inking… Even during the toning and finishing stages, you sometimes trace the same lines again. It gets tiring, and honestly, I often found myself thinking, “I’ve had enough of this.”
And it’s not just one panel—we’re talking about multiple panels per page. For example, with five panels per page across 32 pages, that’s around 160 panels. (Though some panels are blank or just text.)
Even if I’ve already expressed my intention clearly during the name stage, I still have to draw everything neatly so others can understand it—or even so I can understand it myself when I look back later. That part is truly painful. I already feel satisfied after making the name, but I still need to clean it up for final reading.
Physical Discomfort
As I mentioned earlier, drawing requires a lot of upper-body tension. I often had stiff shoulders and back pain. That stiffness sometimes caused nerve pain in my arms, or lower back pain triggered by back tightness. Since I would get completely focused while drawing, I’d often stay in the same posture for too long, which made things worse physically.
When I Tried to Get By with Copy-Paste
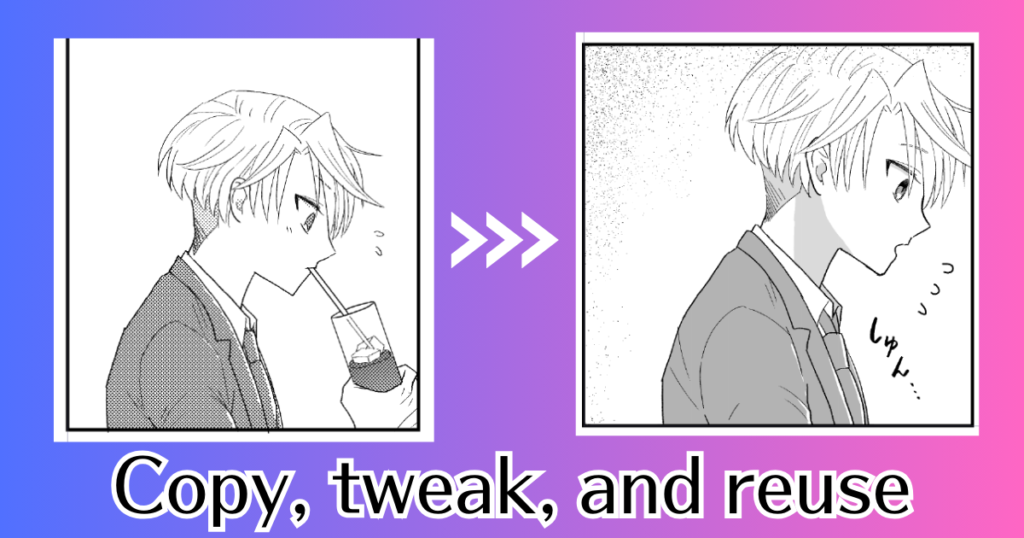
There was a time when I hated drawing so much that I just reused artwork by copy-pasting. But as expected, it was super obvious—it really looked like copy-paste. That’s one thing I appreciate about AI: it doesn’t generate the exact same image every time. There are small differences in the output, which makes a big difference visually.
The Workflow with AI

- Plot and storyboard (name)
- Panel layout and text placement
- Image generation and manual touch-ups
- Toning
- Final touches like effects and hand-drawn text
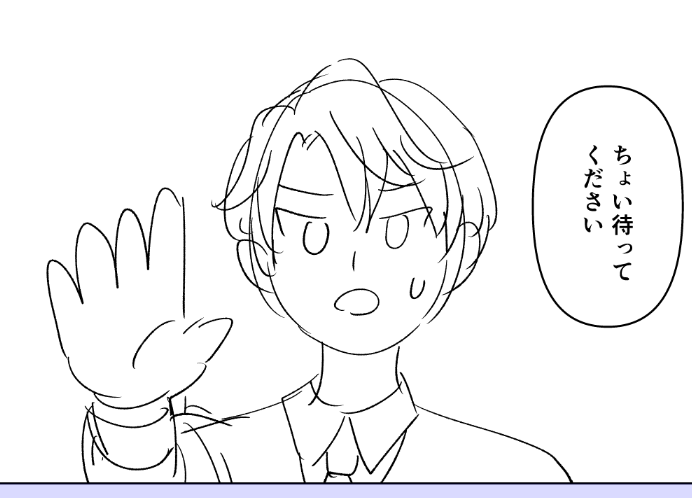
In the image, the colored text highlights the parts of the process related to drawing. These are the steps that used to involve repeatedly drawing the same things, and they are now significantly shortened thanks to AI.
Technique 1: Letting Text-to-Image Handle Poses and Composition
Example: No Need to Think When You’re Out of Ideas
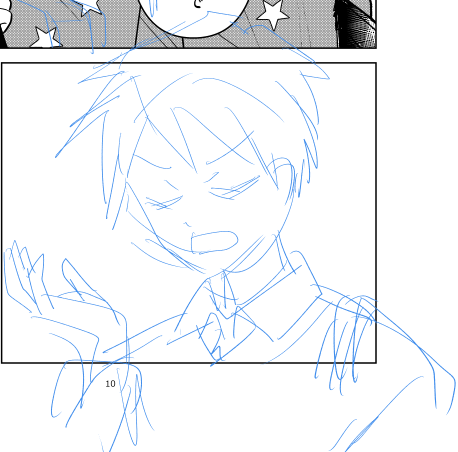
1) Text-to-Image with My Custom LoRA
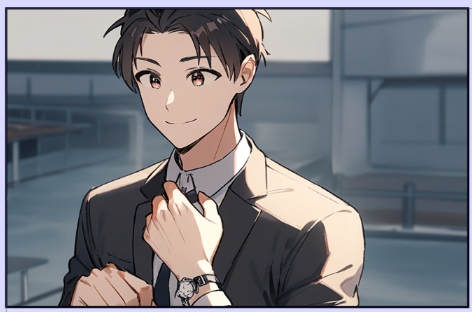
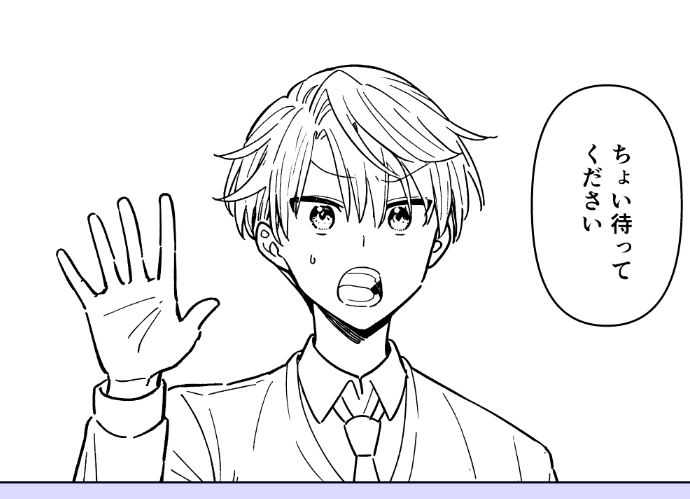
This panel was meant to show a character looking at his watch, but I wasn’t sure how to draw it. So I used a prompt like “show his watch” and let the AI generate it for me.
Settings
I applied my custom LoRA at a strength of 0.6. If I go closer to 1.0, the pose tends to follow the dataset too strictly, so around 0.6 works best in my case. Since I didn’t need high detail, I generated the image at 1024×1024 resolution.
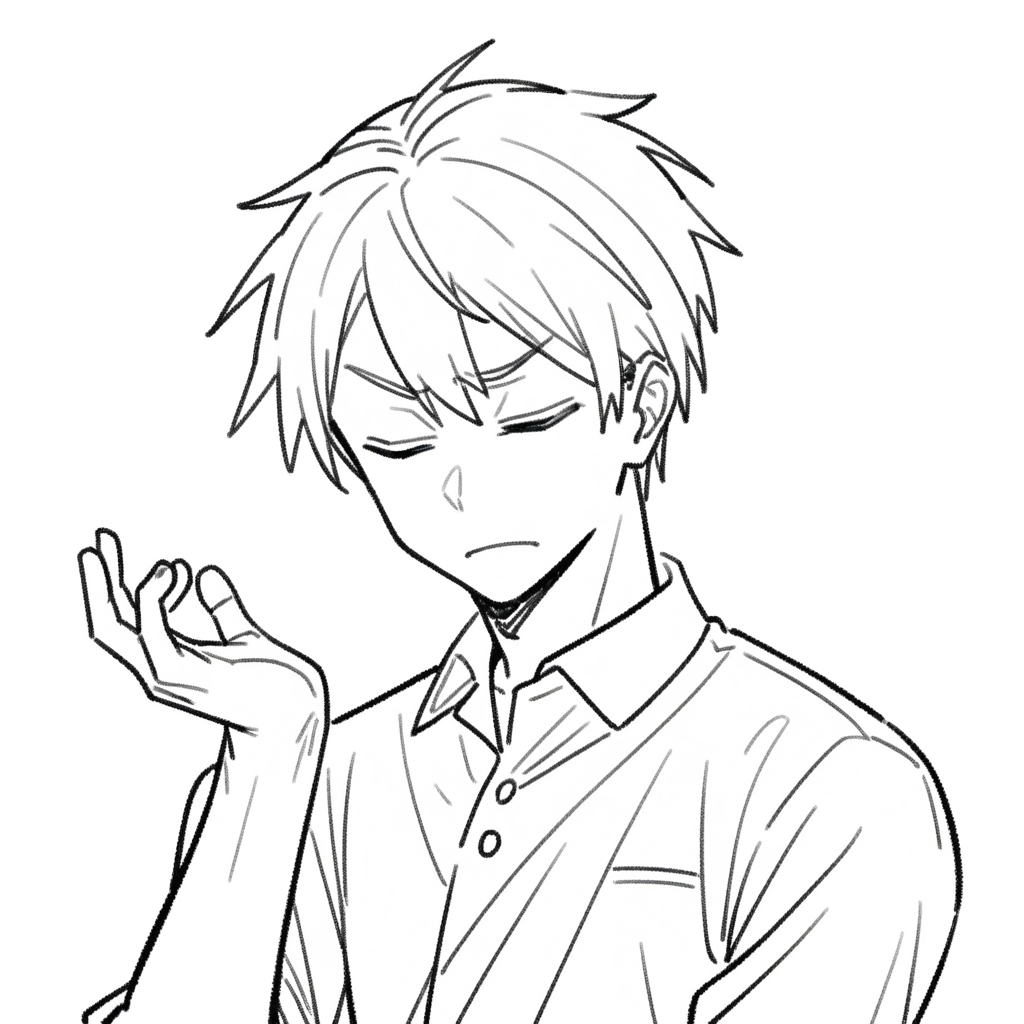
2) Convert the T2I Image to Line Art with Anytest and Make Edits
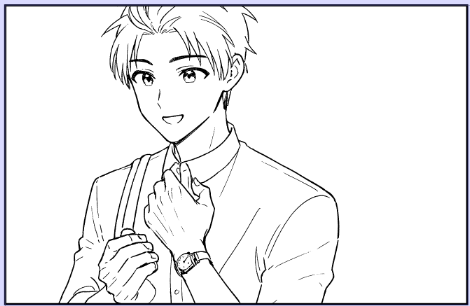
Next, I converted the image generated by text-to-image (T2I) into line art using Anytest. For this step, I used a technique called “blank image to image” (white i2i). Since my custom LoRA was trained on line art, it also functions well as a line art LoRA.
White i2i is a method where you input a completely blank white image into image-to-image (i2i) with a denoising strength of 1. You can also add prompts like “lineart,” “white tone,” or “monochrome” to help guide the output.
If you have a base image, you input it into ControlNet.
Settings
Prompt: I used the same prompt from the T2I step, with some extra “white i2i magic words” at the beginning (see above). My custom LoRA was applied at a strength of 0.6, same as before. The image size was also 1024×1024, same as in the T2I step.
Since it’s white i2i, I set a completely white image as the input for i2i, and used the previously generated T2I image as the input for ControlNet.
ControlNet settings:
- Preprocessor: none
- Model: Anytest V4
- Weight: 0.7
- Guidance End: 0.5
Other settings were left as default.
After that, I manually edited the image. First, I enlarged it and converted it to binary (black and white). I removed the jacket collar, changed the position of the right hand, and made slight edits to the face.
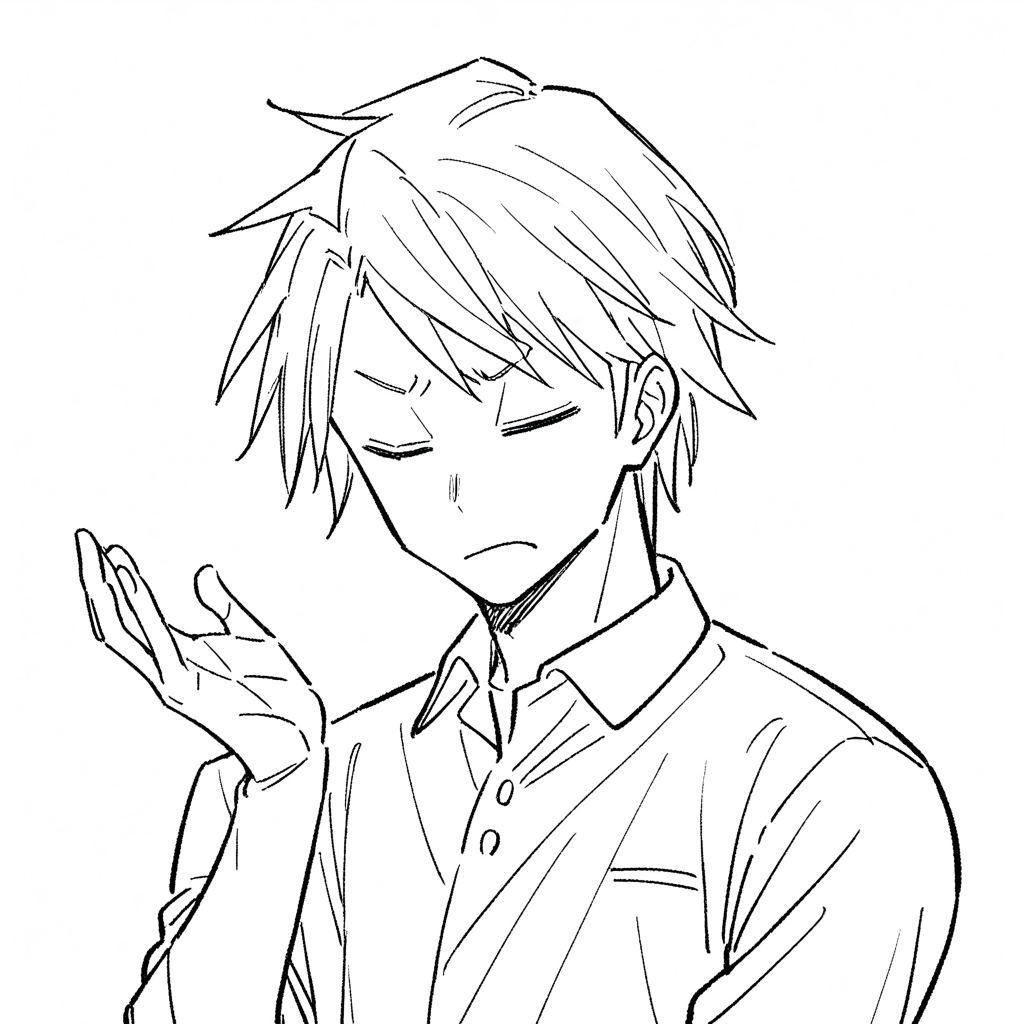
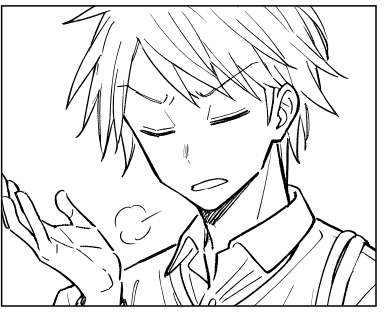
3) Manual Finishing
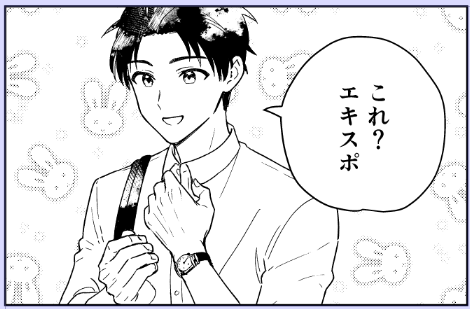
I completed the piece by manually adding fills, tones, and other finishing touches.
Benefit: Less Trial and Error
In this case, I only had a rough idea of what the panel should show—I hadn’t decided how exactly to draw it. Without AI, I would’ve spent a long time thinking “What should I do?” while trying out multiple poses, going back and forth. But with AI, I can just generate a few options and pick the one I like. It’s much easier.
When to Use: For Script-Only Storyboards
This method works especially well for people who start with a script-style storyboard (text name). It’s also great if you’re like me—someone who skips over the hard parts and ends up struggling later!
Technique 2: Improve Drawing Efficiency with i2i from Rough Sketches
Example: Skip the Rough Draft Step
1) Rough Sketch
In my case, this is about the level of roughness I use for a name or a pre-rough draft.
2) Custom LoRA + White i2i + Anytest
I take a screenshot of the rough sketch and paste it into ControlNet. Even if the screenshot is messy, using “Resize and Fill” usually works fine. Since the rough is very loose, I keep the Anytest weight low.
Out of several generations, I chose these two and combined them.
Settings
Prompt: I first input the rough sketch into the i2i tab and use Interrogate DeepBooru (the cardboard box icon under the Generate button) to generate a prompt. If the word “sketch” is included, I remove it and adjust as needed.
Image: After getting the prompt, I replace the rough sketch with a white image, since we’re doing white i2i. Set the Denoising Strength to 1.
ControlNet: Input the rough sketch image.
- Preprocessor: none
- Model: Anytest V3 (V4 should also work fine)
- Weight: 0.45
- Guidance End: 0.6
- Resize Mode: Crop and Resize
- Other settings are default.
3) Minor Manual Fixes
After doing a rough composite and converting to binary, I redrew the face and other details. Then I added tones and final touches to complete the panel.
Benefit: You Can Get Exactly What You Want
If I tried to generate this image with T2I, I’d need to write a detailed prompt. But the reason I draw manga in the first place is because it’s often faster to draw than to describe in words.
It’s especially difficult to specify things like hand positions using just text. In those cases, it’s much easier to input a sketch directly.
When using AI for manga production, I think this kind of workflow—feeding in your own rough drawings and improving their quality—is currently the most practical and reliable approach.
When to Use It: Repetitive Panels
Earlier, I mentioned that pure copy-paste doesn’t work very well. But if you use AI in the process, it can generate slightly different versions, which is really helpful.
So for those panels where you feel like yelling, “Just let me copy-paste already!”—try generating them with AI instead.
(Although honestly, drawing a rough sketch and generating from that might be faster than searching for a copy-paste base.)
Technique 3: Generate Side Characters from Rough Sketches (No LoRA Required)
Example: Generate Characters Without Training
1) Rough Sketch
This image is a screenshot, so you can see other panels as well. When I actually do i2i, I select the rough sketch area from the layer using a rectangular selection and paste it into the i2i source or ControlNet. In this screenshot, the rough is drawn on a blue “draft” layer, but when I copy it, I switch back to a normal layer so the lines are black.
2) Line Art Conversion
Next, I convert the rough sketch into line art. Since this character hasn’t been trained into any LoRA, I didn’t use my custom LoRA or Anytest at this stage.
I used regular i2i (by inputting the rough sketch) with a line art LoRA called sdxl-lineart_06 set at 0.5.
Download link for sdxl-lineart_06
One of the generated images

Edited version of the generated image (the hand was composited from another generation)
Settings
Prompt: I input the rough sketch into the i2i tab and used Interrogate DeepBooru (click the cardboard box icon under the Generate button) to generate a prompt. If the prompt includes “sketch,” I remove or adjust it. Then I apply the line art LoRA at 0.5.
Image: After generating the prompt, I replace the rough sketch with a white image. Since this is white i2i, I set Denoising Strength to 1.
ControlNet: Input the rough sketch image.
- Preprocessor: none
- Model: Anytest V4
- Weight: 0.45
- Guidance End: 0.6
- Resize Mode: Resize and Fill
Other settings are default.
3) Refinement Using Custom LoRA + White i2i + Anytest
I then used the edited line art as the input and applied my custom LoRA. I set the prompt to include a similar-looking character with a low strength setting. I increased the strength of Anytest for more structure control.
Generated image
Edited version of the generated image
Settings
Prompt: I reused the earlier prompt, but swapped out the line art LoRA for my custom LoRA at 0.6.
Image: White i2i again, so Denoising Strength is 1.
ControlNet:
- Input: rough sketch
- Preprocessor: none
- Model: Anytest V4
- Weight: 0.75
- Guidance End: 0.6
Other settings are default.
Benefit: No Training Needed
With this method, you don’t need to train a LoRA, yet you can still generate something that looks close to your own art style (or rather, a similar character).
When to Use It: Minor Characters with Only a Few Panels
Normally, training a LoRA requires at least 10 reference images. But for minor characters who only appear in small or distant panels, gathering good training data can be difficult.
Training itself also takes time to prepare datasets and run the process. For simple background characters, this method may be good enough.
That said, CoppyLoRA_WebUI V2 now has a DetailTrain mode, which makes it easy to do lightweight copy-based training.
So even for minor characters, it might be worth training them quickly if needed.
Learn more about CoppyLoRA_WebUI V2 here
The Potential of Hybrid Creation with AI and Hand-Drawn Art
Most of All, It Reduces Fatigue
As I’ve mentioned several times, combining hand-drawing with AI significantly reduces the effort needed to create artwork. It also helps conserve physical energy—and more importantly, it reduces mental fatigue.
Of course, using your brain is part of what makes drawing fun. But if you’re someone who needs to draw for reasons beyond just enjoyment, I really recommend giving AI a try.
Giving Visual Instructions Is Possible Because You Can Draw
When trying to make manga with only AI, text-to-image requires you to come up with prompts. But if you can draw, sometimes it’s easier and more precise to give visual input instead of writing it out.
This is especially useful in manga, where you often have to depict a character mid-action. These kinds of poses are much easier to generate accurately by using a reference image.
Also, when you consider things like visual flow and the layout between speech bubbles and the artwork, I believe giving instructions through drawings is definitely more effective.
What I Want to Try Next
Right now, I rely on 3D for backgrounds—but I’d love to bring AI into that process too.
When it comes to structure, spatial layout, and consistency, 3D is still much better than AI. So I’m thinking it might be best to create simple 3D models and then use AI to enhance them with added detail.
I haven’t had much time to explore this yet, but I plan to work on it little by little. Thanks for reading, and I hope to see you again next year—Happy New Year (a bit early)!